Fastlane and beyond (Phần 2: Toys aka actions)
Bài viết trước bạn đã biết được cách cấu hình Fastfile vào project của mình, cách viết lane, cách để chạy lane đó trên terminal. Ở bài viết này chúng ta sẽ chuyển sang vọc các action hay xài như Slack, Screengrab và Firebase App Distribution. Từ trải nghiệm của bản thân thì minh tin rằng sau khi bỏ những “toys” này vào project thì bạn sẽ dư thêm kha khá thời gian để làm những việc khác. Okay không lằng nhằng, bắt tay vào việc nào.
1. Screengrab #
Chúng ta cùng khởi động bằng screengrab, đây là action giúp bạn có thể chụp ảnh màn hình tự động cho nhiều loại thiết bị và ngôn ngữ khác nhau. Một action khá tiện lợi cho những ai muốn đăng ảnh app lên store mà không muốn tốn quá nhiều thời gian ngồi chụp màn hình bằng tay.
1.1 Cài đặt #
Để cài đặt, chúng ta sử dụng dòng lệnh
sudo gem install screengrab
Tiếp theo, thêm những permission sau vào AndroidManifest
<!-- Allows unlocking your device and activating its screen so UI tests can succeed -->
<uses-permission android:name="android.permission.DISABLE_KEYGUARD"/>
<uses-permission android:name="android.permission.WAKE_LOCK"/>

<!-- Allows for storing and retrieving screenshots -->
<uses-permission android:name="android.permission.WRITE_EXTERNAL_STORAGE" />
<uses-permission android:name="android.permission.READ_EXTERNAL_STORAGE" />

<!-- Allows changing locales -->
<uses-permission android:name="android.permission.CHANGE_CONFIGURATION" />
Muốn chạy được nó thì bạn cần phải viết 1 file test để chạy tự động thông qua Instrumentation Testing. Mở file app/build.gradle thêm config này vào phần dependencies
androidTestImplementation 'tools.fastlane:screengrab:2.0.0'
Phần cài đặt đã xong, giờ ta sẽ chuyển qua phần test.
1.2 Instrumentation Tests #
Mở app/src/androidTest, ta sẽ thấy được phần instrumentation tests. Tạo 1 file instrumentation test mới, đặt tên cho file này là ExampleInstrumentedTest, nếu trong project đã có file này thì chúng ta chỉ cần viết thêm vào.

Thêm đoạn code sau vào file ExampleInstrumentedTest
import androidx.test.espresso.Espresso
import androidx.test.espresso.action.ViewActions
import androidx.test.espresso.assertion.ViewAssertions
import androidx.test.espresso.matcher.ViewMatchers
import androidx.test.rule.ActivityTestRule
import org.junit.Rule
import org.junit.Test
import org.junit.runner.RunWith
import org.junit.runners.JUnit4
import tools.fastlane.screengrab.Screengrab
import tools.fastlane.screengrab.UiAutomatorScreenshotStrategy
import tools.fastlane.screengrab.locale.LocaleTestRule

@RunWith(JUnit4::class)
class ExampleInstrumentedTest {
    // JVMField needed!
    @Rule
    @JvmField
    val localeTestRule = LocaleTestRule()

    @get:Rule
    val activityRule = ActivityTestRule(MainActivity::class.java, false, false)

    @Test
    fun testTakeScreenshot() {
        activityRule.launchActivity(null)

        // 1. Prepares to take a screenshot of the app
        Screengrab.setDefaultScreenshotStrategy(UiAutomatorScreenshotStrategy())
        Espresso.onView(ViewMatchers.withId(R.id.btnAsk))
            .check(ViewAssertions.matches(ViewMatchers.isDisplayed()))

        // 2. Takes a screenshot of the first screen
        Screengrab.screenshot("magic_ball_before_click")

        // 3. Selects the Ask button and triggers a click on it
        Espresso.onView(ViewMatchers.withId(R.id.btnAsk))
            .perform(ViewActions.click())

        // 4. Take another screenshot
        Screengrab.screenshot("magic_ball_after_click")
    }
}
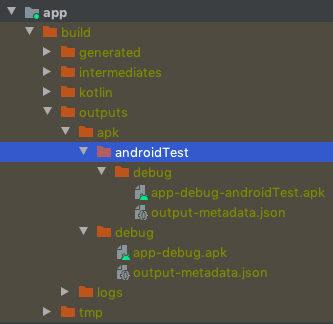
Bây giờ mỗi lần bạn build file apk thì folder chứa apk sẽ chia ra làm 2 loại, 1 là file apk thông thường, còn lại là apk test để chạy automation cho UI.
Chạy lệnh này
./gradlew assembleDebug assembleAndroidTest
Sau khi tiến trình chạy xong thì ta sẽ có được 2 folders chứa apk thông thường và apk test như trong hình
Khâu chuẩn bị đã hoàn tất, giờ chúng ta sẽ chụp màn hình tự động thông qua fastlane.
1.3 Screenshot #
Khởi tạo Screengrabfile, đây là file lưu toàn bộ config cho screengrab
bundle exec fastlane screengrab init
Ta sẽ config Screengrabfile như sau
# Set the path to the Android SDK
android_home('$PATH')

# Starts adb in root mode, giving you elevated permissions to writing to the device
use_adb_root(true)

# Sets the unique package name of your app
app_package_name('com.huypham.fastlaneandbeyond')

# The file path to the app APK and test APK files
app_apk_path('app/build/outputs/apk/debug/app-debug.apk')
tests_apk_path('app/build/outputs/apk/androidTest/debug/app-debug-androidTest.apk')

# Designates the areas where you want to create screenshots
locales(['en-US', 'fr-FR'])

# If set to true, this clears all previously-generated screenshots in your local output directory before creating new ones
clear_previous_screenshots(true)
Để mình giải thích chút về đoạn config:
- Đầu tiên ta sẽ lấy path dẫn đến Android SDK.
- Tiếp theo ta config để có thể chạy
adbtừ root mode, điều này cho phép ta có quyền truy cập vào device. - Dẫn package name và đường dẫn đến thư mục chứa apk và apk test như phần trên ta đã chuẩn bị.
- Khu vực mà bạn muốn ảnh xuất ra với ngôn ngữ nơi đó, ở đây mình để tiếng Anh và tiếng Pháp.
- Cuối cùng là thiết lập xóa toàn bộ những ảnh đã chụp ở lần chụp trước.
Chạy test thử trên emulator device, bạn cần phải check adb trên máy mình. Chạy lệnh sau để check
adb devices
Nếu không có thì hãy thêm dòng config sau vào file .zshrc
export ANDROID_HOME=/Users/$USER/Library/Android/sdk
export PATH=${PATH}:$ANDROID_HOME/tools:$ANDROID_HOME/platform-tools
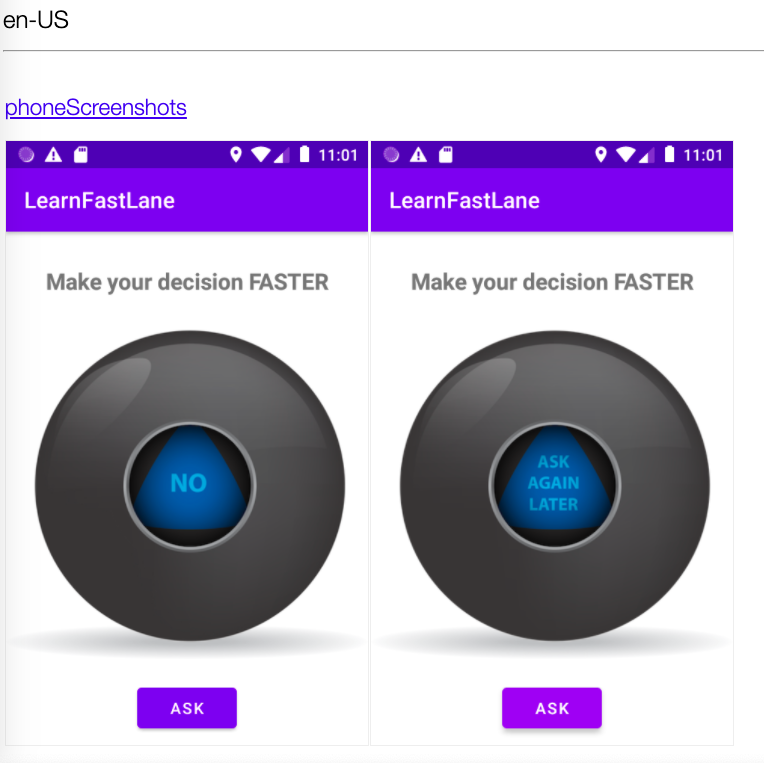
Giờ ta sẽ lệnh sau để kích hoạt chức năng chụp màn hình tự động của action screengrab
bundle exec fastlane screengrab
Ta sẽ được kết quả như sau
Ta sẽ viết 1 lane để có thể thực hiện build file apk và chụp màn hình tự động
desc "Build debug and test APK for screenshots"
lane :build_for_screengrab do
  gradle(
    task: 'clean'
  )
  gradle(
    task: 'assemble',
    build_type: 'Debug'
  )
  gradle(
    task: 'assemble',
    build_type: 'AndroidTest'
  )
end
Để chạy lane này thì ta sẽ nối 2 lần chạy fastlane lại như đoạn lệnh sau
bundle exec fastlane build_for_screengrab && bundle exec fastlane screengrab
Okay, vậy là xong action đầu tiên. Tiếp theo chúng ta cùng đến với Slack action, tìm hiểu cách gửi tin nhắn và file apk tự động lên Slack.
2. Slack #
Với Slack action ta sẽ làm 2 việc đó là gửi tin nhắn và gửi file apk.
2.1 Slack message #
Ta sẽ sử dụng Webhook để gửi tin nhắn lên Slack. Bản chất của Webhook là Slack URL cho phép gửi mọi thứ real-time lên channel của Slack hoặc đến 1 người cụ thể. Để config Webhook ta làm theo hướng dẫn tại incoming webhook app.
Copy URL vừa được tạo ra, paste nó vào file .env. Nếu bạn chưa biết file .env để làm gì thì hãy đọc lại Phần 1 nhé.
# Add SLACK_URL NOTIFICATION
SLACK_MESSAGE_URL="https://hooks.slack.com/services/T00000000/B00000000/XXXXXXXXXXXXXXXXXXXXXXXX"
Ta viết lane để chạy action này như sau
desc "Notify a message to Slack after run successful"
lane :notify_slack_message do
  ENV["SLACK_URL"]

  gradle(task: "clean assembleDebug")
  slack(
    message: "Slack Message Delivered Successfully",
    success: true,
    payload: {
      "Build Date" => Time.new.to_s,
      "Build By" => "huypham"
    }
  )
end
Kết quả thu được
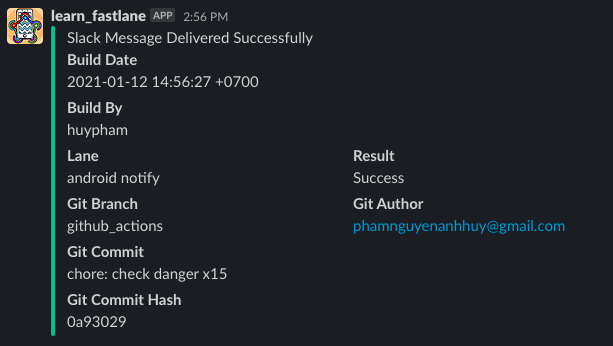
Lane này sẽ thực hiện 2 actions, đầu tiên là gradle action, nó sẽ clean toàn bộ phần thư mục build sau đó thực hiện việc build cho variant debug. Tiếp theo là slack action, nó thực hiện việc hiển thị message ta muốn lên channel Slack đã được gán trước thông qua SLACK_URL.
2.2 Slack file #
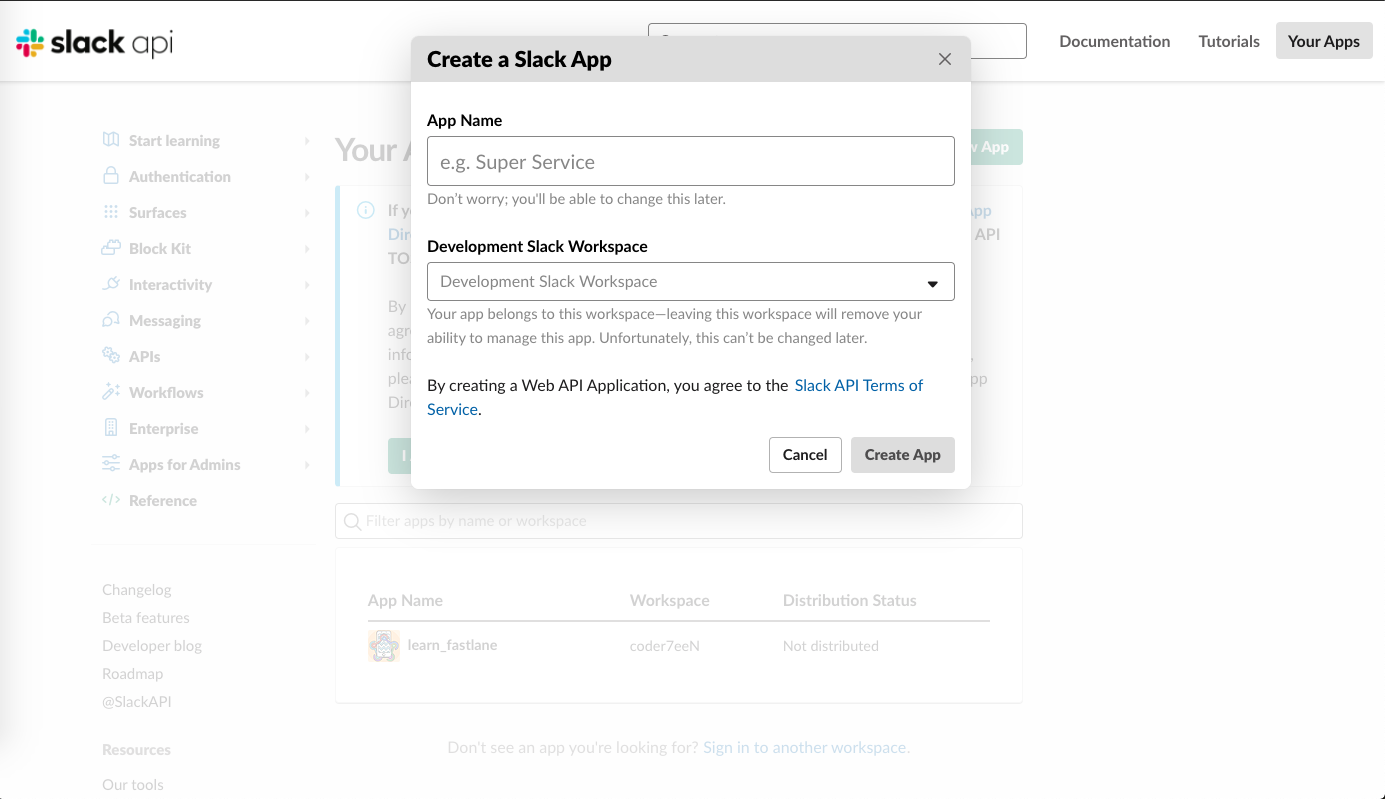
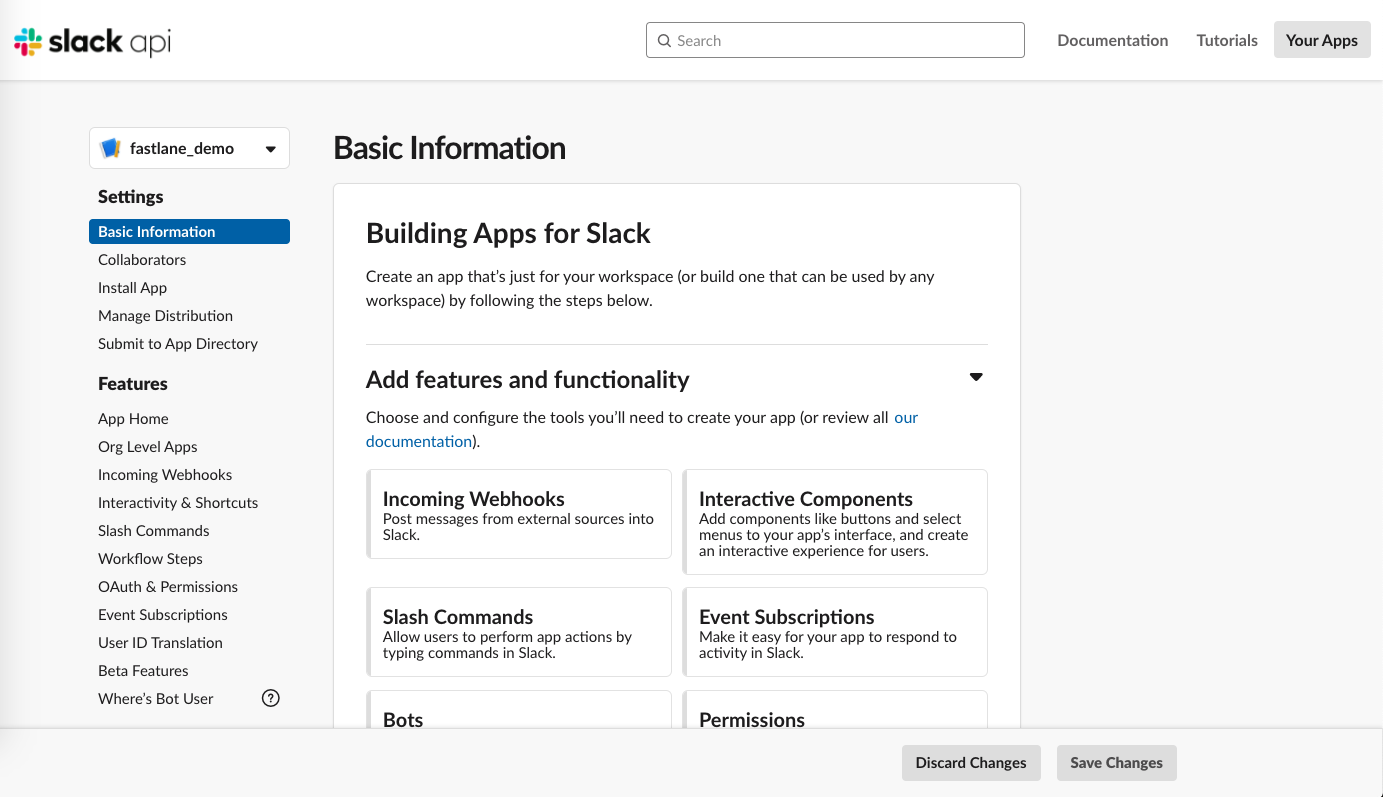
Tuy nhiên, muốn share file apk lên Slack thì ta phải tạo một app trên Slack. Sử dụng link https://api.slack.com/apps này để tạo app.
Điền tên app và workspace sử dụng app
Chọn Incoming Webhooks trong phần Basic Information
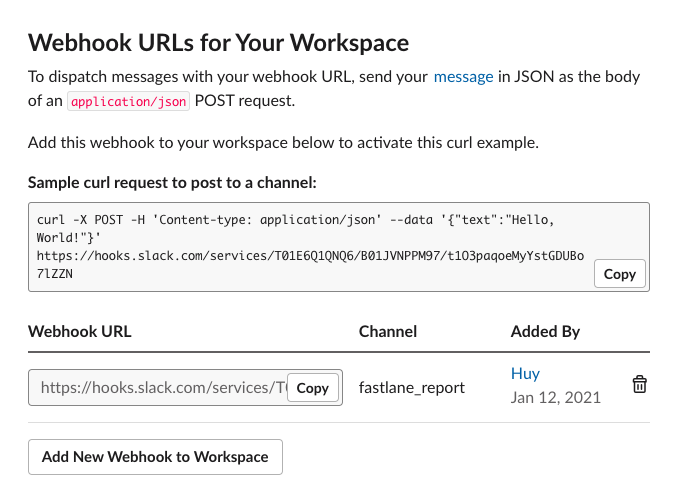
Active Incoming webhook và nhấn vào Add New Webhook to Workspace để tạo ra URL cho app, nhớ chọn channel để app có thể gửi tin nhắn và file apk lên đó
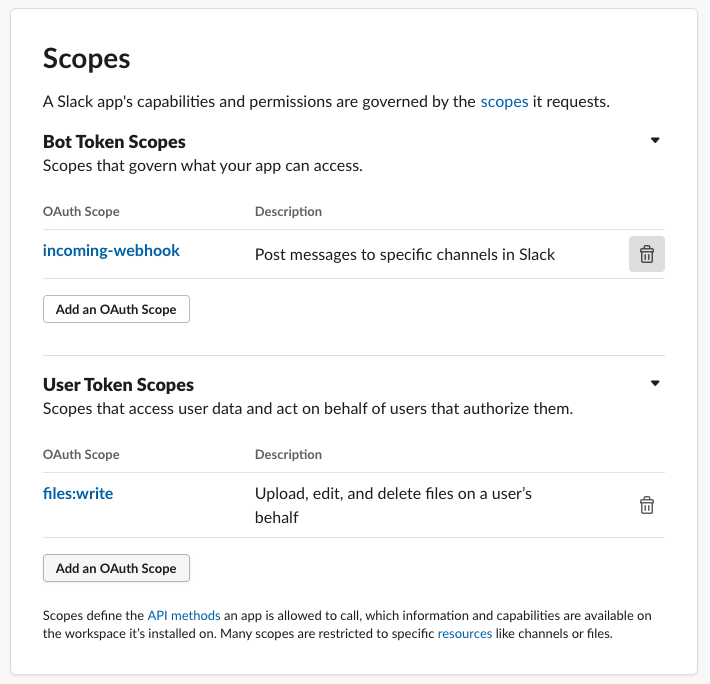
Trong phần OAuth & Permission ta lấy access_token tại Bot User OAuth Access Token, đồng thời cài đặt Scope như trong hình
Giờ ta sẽ viết lane để có thể gửi file apk và message lên channel ta đã chọn. Nhưng đầu tiên ta cần config lại file .env
# Add SLACK_URL & ACCESS_TOKEN
SLACK_URL="https://hooks.slack.com/services/T00000000/B00000000/XXXXXXXXXXXXXXXXXXXXXXXX"
ACCESS_TOKEN="xoxp-1482..."
Lane:
desc "Build a Debug APK & deploy to slack"
lane :slack_apk_build do |options|
  gradle(
    task: "assemble",
    build_type: options[:build_type],
    print_command: true
  )
  upload_to_slack
  slack(
    message: ":rocket: *Build #{options[:build_type]} APK Successful!* :rocket:",
    success: true,
    payload: {
      "Build Date" => Time.new.to_s,
      "Build By" => options[:build_type]
    }
  )
end

desc "Upload APK to Slack channel"
private_lane :upload_to_slack do
  file_path = lane_context[SharedValues::GRADLE_APK_OUTPUT_PATH]
  file_name = file_path.gsub(/\/.*\//,"")
  access_token = ENV["ACCESS_TOKEN"]
  channel_name = "your_channel_name"

  sh "echo Uploading " + file_name + " to Slack"
  sh "curl https://slack.com/api/files.upload -F token=\"" + access_token + "\" -F channels=\"" + channel_name + "\" -F title=\"" + file_name + "\" -F filename=\"" + file_name + "\" -F file=@" + file_path
end
Trước khi chạy thử lane thì bạn nhớ điền tên channel đã đăng kí vào phần channel_name, ok chạy thử nào
bundle exec fastlane slack_apk_build build_type:"debug"
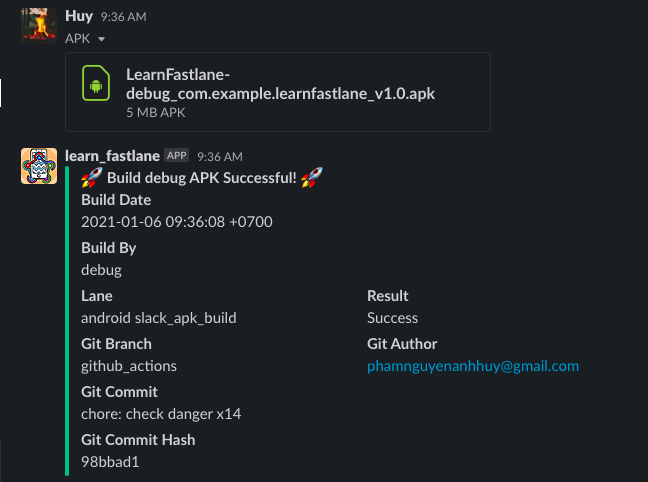
Kết quả thu được
Ở lane trên ta thấy có cú pháp options và private_lane, để mình giải thích chút về 2 cú pháp này. private_lane đây là lane giúp bạn viết những đoạn script có thể reuse nhiều lần, lane này chỉ có thể chạy khi được gọi ở 1 lane không phải private. Còn options là cú pháp giúp bạn có thể truyền param vào câu lệnh khi chạy trên command line như ví dụ trên là build_type:”debug”. Để hiểu rõ hơn, tham khảo Passing Parameters và Private lanes.
Okay giờ còn 1 action cuối - Firebase App Distribution là bạn đã có thể ngồi rung đùi nhìn máy làm hết những việc mà trước kia bạn phải ngồi làm tay từng cái.
3. Firebase App Distribution #
Đây là tool giúp bạn đưa file apk đến cho tester soi bug. Đầu tiên bạn cần phải tạo project Firebase thông qua website này Firebase website. Nhấn vào Go to console và tạo một project mới, sau đó Add Firebase to your Android app. Bước này bạn chỉ cần làm theo hướng dẫn của Google là có thể hoàn thành. Khi đã hoàn thành những bước trên, vào General Setting page kéo xuống phần Your app và ghi lại AppID, chúng ta sẽ cần nó để config Fastlane.
3.1 Firebase CLI #
Khi sử dụng Fastlane để upload file apk lên Firebase App Distribution, nó sẽ phải thông qua Firebase CLI để kết nối với server của Firebase. Tham khảo CLI để cài đặt hoặc update cho đúng với OS bạn đang xài.
Sau khi cài đặt xong, chạy lệnh sau để đăng nhập vào tài khoản Firebase của bạn
firebase login
3.2 Firebase App Distribution Plugin #
Chạy đoạn lệnh sau để cài đặt
bundle exec fastlane add_plugin firebase_app_distribution
Bạn sẽ thấy được thông báo như sau
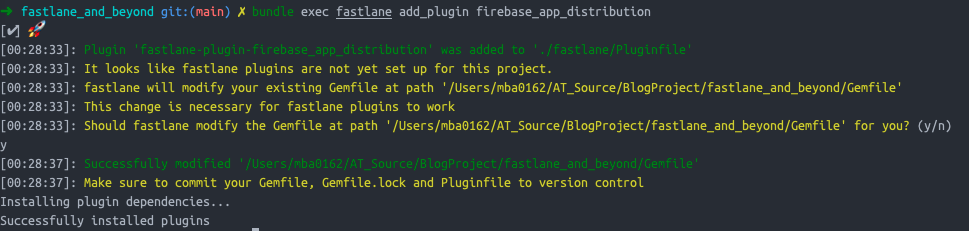
Nhấn y để hoàn tất cài đặt.
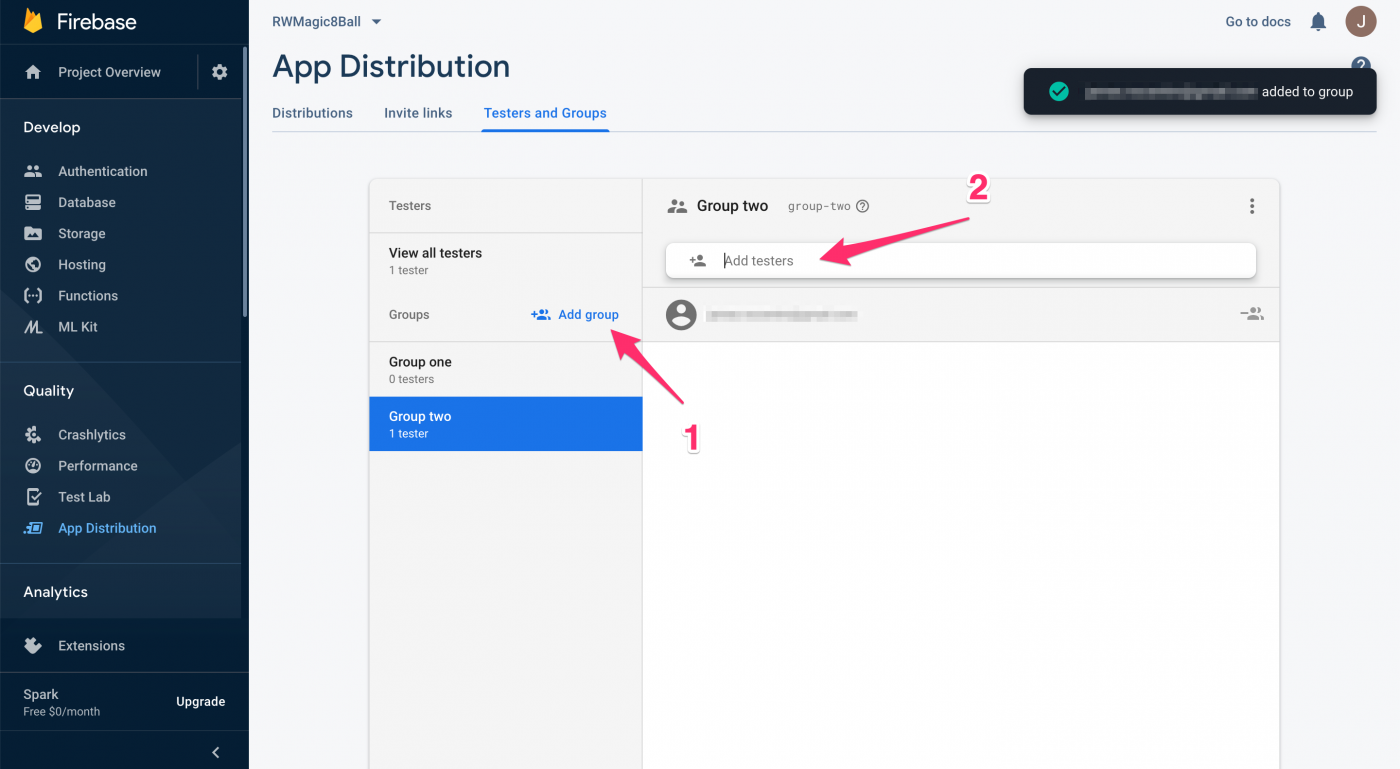
Tiếp theo, bạn hãy set group như trong hình
Bạn còn nhớ AppID lúc nãy chứ, hãy dán nó vào file .env như sau
FIREBASE_APP_ID_ANDROID="1:123456789:android:abcd1234"
3.3 Deploy #
Chúng ta sẽ viết lane để deploy file apk cho variant debug lên cho những tester ở group vừa set phía trên
desc "Deploy latest debug to Firebase App Distribution"
lane :distribute do
  build_android_app(task: "assembleDebug")

  firebase_app_distribution(
    app: ENV['FIREBASE_APP_ID_ANDROID'],
    groups: "group_1",
    release_notes: Fastlane Release note Debug env
  )
end
Chạy lane nào
bundle exec fastlane distribute
Check lại phần App Distribution trên Firebase để tận hưởng thành quả.
Qua part 1 và part 2 chắc hẳn bạn đã có thể dư được thêm chút thời gian để làm được nhiều việc hơn. Ở part 3 mình sẽ hướng dẫn bạn tích hợp CI (Continuous Integration) vào để việc tự động hóa được lên 1 tầm cao mới.